P4A – PHP for Arduino part 1
If you already know Arduino stuff a bit, maybe you want to connect it with a network somehow. It could be some network-enabled home automation solution or a set of sensors sending data to a database. So, here comes the Ethernet Shield to help you.
First, a bit of history. Initially, the Ethernet Shield was compatible with the small Arduino. Why not with Mega? It’s because for communication with W5100 IC, a heart of the shield, SPI protocol is used. In Arduino Mega SPI occupies a different set of digital outputs (not 10, 11, 12 and 13). Of course, there’s a workaround for this – wiring the shield up with cables.
That involves the older shields. The ones which are currently sold by Nettigo are compatible both with small Arduinos (UNO, Duemilanove) and Mega (with ATmega1280 and ATmega2560 microcontrollers). How to recognize such a shield? If there’s a microSD slot – it’s the newer version.
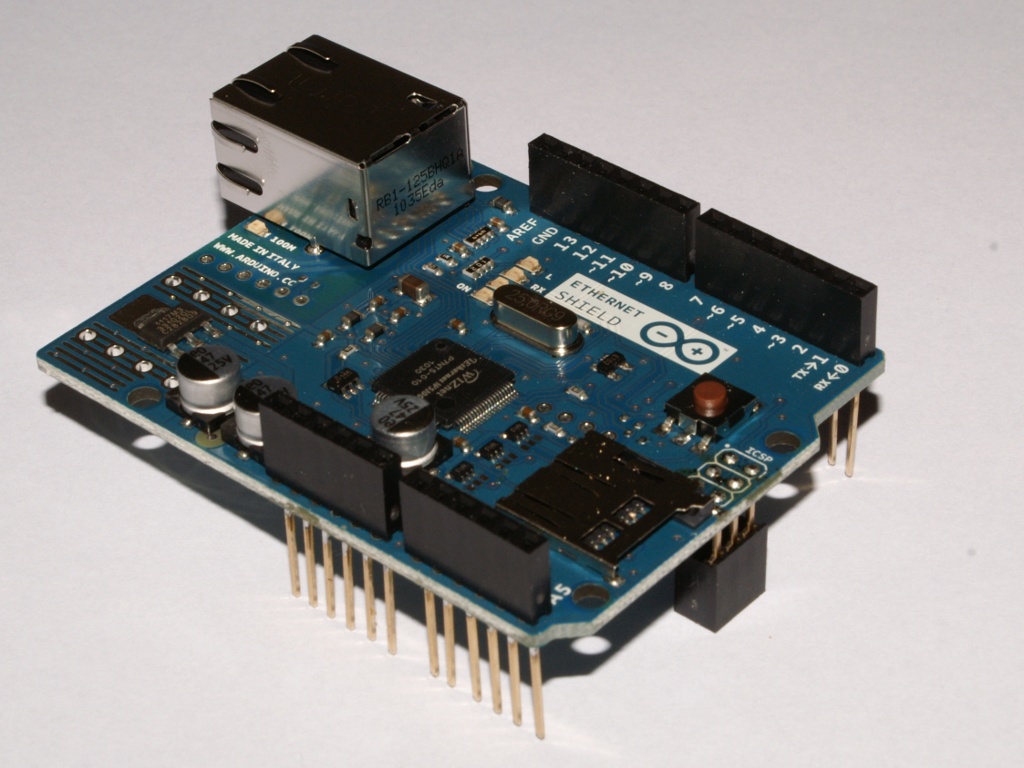
W5100 – the IC powering Ethernet Shield is a chip made by Korean-based WIZnet. The difference between it and other Ethernet controllers is TCP/IP stack implementation. In W5100, the stack is implemented directly in the chip. What it means for an ordinary user? The communication library uses less RAM and occupies less space on flash memory in compare to chips with no TCP/IP stack.
How to take advantage of Ethernet Shield?
There’s plenty of examples on the Internet, how to make websites displaying data from Arduino. However, if you have any bigger experience with Arduino programming, you probably know that every single text string, even the one defined in the program code, needs some amount of space in RAM memory. And, of course, there always lacks of RAM memory.
Let’s check out the official example from the Arduino Tutorial. Code:
 client.println("HTTP/1.1 200 OK");
 client.println("Content-Type: text/html");
 client.println();
It will take 40 bytes of RAM (15 chars in HTTP… + trailing zero and 23 in Conte… + trailing zero). It’s simple to imagine, how important it is when we have only 2kB to use. The HTML website shouldn’t be too complex.
Fortunately, there’s a soution – storing the strings in Flash memory. It can lower the usage of RAM memory, but sometimes by adding some code. Accessing strings defined in this way is possible only with a special macro and the compiler wouldn’t let us to use this macro in function char * as a parameter. What’s more, any change in the HTML code forces us to recompile whole sketch and upload it to Arduino.
Wait, the Ethernet Shield has a microSD slot, hasn’t it? Couldn’t we take advantage of it somehow? So, it’s possible, but requires a bit of work.
First – the Ethernet Shield has to be configured for work in a network – this means setting the MAC and IP addresses. This can be done like that:
byte mac[] = { 0xDE, 0xAD, 0xBE, 0xEF, 0xFE, 0xED };
byte ip[] = { 192,168,1, 177 };

Ethernet.begin(mac, ip);
MAC address is given on a sticker on the back side of the shield. IP address depends on the network’s configuration. The sequence Ethernet.begin will work only in a local network, this means, when all of the IP addresses belong to the same subnet. If the shield should connect with hosts from other networks (either when operating as a client or as a server) you must specify one more parameter – an array containing 4 numbers – the IP address of default gateway (Yours router IP address). More on the Ethernet Library reference page.
Most of the blocks are ready. The Ethernet library found in Arduino IDE is not the best solution. It simplifies creating, for example, TCP server, but the HTTP server is a few steps away. Thus, the Webduino will be very useful. It’s a HTTP server based on the Ethernet library, so we have most of work done.
Normally, we would download it from there and unpack to sketchbook/libraries, but now we are going to modify Webduino a little, the final version will be available at the end of this mini tutorial, so for now, you needn’t to install anything.
Webduino – how to begin?
At first – we have to know that with this:
void addCommand(const char *verb, Command *cmd);
we are able to register any function invoked every time when a URL matches verb. Example:
webserver.addCommand("blob.htm", &blob);
If the URL begins with blob.htm, then the function blob will be invoked. The function has to receive parameters according to the definition in Command:
typedef void Command(WebServer &server, ConnectionType type,

                       char *url_tail, bool tail_complete);
server is a WebServer object, for which the method was invoked, type – type of request (INVALID, GET, HEAD, POST), url_tail the remaining part of matched URL address (after blob.htm). If the URL has to be truncated because of too small Webduino buffer, the last parameter tail_complete will have false value.
OK, but it’s not very convenient to register every single function, especially when we want to use data from SD card, which we don’t know. Now, setFailureCommand will be useful to register in our code a function invoked, when none of the functions defined with addCommand was invoked.
Now, it only remains to check if url_tail is a name of a file located on the SD card (because any matching didn’t occur, url_tail contains full URL address including first character ‘/’). If the file doesn’t exist, we’re displaying HTTP 404 error, if does – sending it to the client.
How to read a file from SD card?
Like with HTTP server, we don’t have to do everything by ourselves. A good help will be a tutorial prepared by Limor Fried – a.k.a. LadyAda. She utilizes the SdFatLib library, supporting FAT16 i FAT32 file systems (commonly found on SD and SDHC cards).
Initialization code and file handling was basically taken from the tutorial. I will describe here the fetchSD function, registered by setFailureCommand. Its objective is to find a file on the card and send it to web browser:
P(CT_PNG) = "image/png\n";
P(CT_JPG) = "image/jpeg\n";
P(CT_HTML) = "text/html\n";
P(CT_CSS) = "text/css\n";
P(CT_PLAIN) = "text/plain\n";
P(CT) = "Content-type: ";
P(OK) = "HTTP/1.0 200 OK\n";
void fetchSD(WebServer &server, WebServer::ConnectionType type, char *urltail, bool){
	char buf[32];
	int16_t  readed;

	++urltail;
	char *dot_index; //Where dot is located
	if (! file.open(&root, urltail, O_READ)) {
		//Real 404
		webserver.httpNotFound();
  } else {
	if (dot_index = strstr(urltail, ".")) {
		++dot_index;
		server.printP(OK);
		server.printP(CT);
		if (!strcmp(dot_index, "htm")) {
				server.printP(CT_HTML);

		} else if (!strcmp(dot_index, "css")) {
				server.printP(CT_CSS);

		} else if (!strcmp(dot_index, "jpg")) {
				server.printP(CT_JPG);

		} else {
				server.printP(CT_PLAIN);
		}
		server.print(CRLF);
	}
	readed = file.read(buf,30);
	while( readed > 0) {
		buf[readed] = 0;
		bufferedSend(server,buf,readed);
		readed = file.read(buf,30);
	}
	flushBuffer(server);
	file.close();
	}
}
At the very beginning we have a few constants stored in Flash memory.
P(CT_PNG) = "image/png\n";
P macro is a part of Webduino and serves for storing strings in Flash and not in RAM. And the constants are names of various content types, so called MIME types. What’s going on? The browser don’t know what data is going to be sent by the server. It finds it out from Content-Type header, which will be described after a while.
Next, we’re getting rid of the slash: ++urltail;, after that we’re trying to open a file on SD card – in case of failure – displaying HTTP 404 (Not Found) error:
	if (! file.open(&root, urltail, O_READ)) {
		//Real 404
		webserver.httpNotFound();
  } else {
and in case of success, we will try to read it in else and send it to the client.
Now some annotations. First of all – SdFatLib only supports short filenames in 8.3 format. If you use longer names (which FAT32 allows), you must remember that the name visible for SdFatLib is different than the one you see in file manager. When you create index.html file (four characters in the extension), the name for SdFatLib would be ind~1.htm. Even after renaming it to index.htm, the catalog entry will be still in extended form. You have to delete the file and create it again with a new name in 8.3 format.
The second annotation – for obvious reasons we won’t worry about the subdirectories. We’re supposing all of files are in the root directory. Maybe in further versions I will add some support for more complex directory trees.
OK, let’s go back to the code fetchSD. If we succeeded to open the file, we’ll search for a dot in its name and check if the rest (after the dot) matches any of the known extensions. This is because it’s not enough to send the data itself to the client. A header with a proper Content-Type must be sent. Otherwise, the data could be interpreted wrong by the browser.
Speaking of it – how an response from a web server should look like. It’s divided into two parts. The first are so called headers. Web browsers treats everything at the beginning as headers, until it find a blank line (the lines are separated by CR LF). The rest is the answer itself. It depends on the headers, how it will be interpreted. The server can help web browsers by setting headers describing the type of data:
Content-type: text/html
Before the colon there is a name of the header (in this case, Content-Type) and after, its value. Here are used so called MIME types. For example image/png for PNG image, image/jpg for JPG and text/html for HTML.
An obligatory header is status – tells, if a client’s request was handled or an error or redirection occurred. HTTP/1.0 200 OK means everything is OK. At the first place is the protocol and its version (HTTP, version 1.0), next the 200 code – which means everything was done properly. Other frequently used codes are 404 – content not found, 301 and 302 – redirections.
Knowing that, we’ll try to recognize the file extension and send appropriate header:
	if (dot_index = strstr(urltail, ".")) {
		++dot_index;
		server.printP(OK);
		server.printP(CT);
		if (!strcmp(dot_index, "htm")) {
				server.printP(CT_HTML);

		} else if (!strcmp(dot_index, "css")) {
				server.printP(CT_CSS);

		} else if (!strcmp(dot_index, "jpg")) {
				server.printP(CT_JPG);

		} else {
				server.printP(CT_PLAIN);
		}
		server.print(CRLF);
Functions with big P at the end don’t expect char *, but const prog_uchar *, which is data type strings stored in flash.
Now we have already the HTTP header (ended with a blank line server.print(CRLF)), so it’s time to send data:
	readed = file.read(buf,30);
	while( readed > 0) {
		buf[readed] = 0;
		bufferedSend(server,buf,readed);
		readed = file.read(buf,30);
	}
	flushBuffer(server);
	file.close();
We’re reading by 30 bytes, sending to client through a function which buffers sent data. What for? If we use the simplest method and send data by one byte, then every single character will be in a separate TCP packet . Very (really, very) ineffective solution. Simply server.write sends the data instantly. We could read file by bigger chunks and send them directly to client. Ability to read file by one char and send response in bigger chunks will be used in second part of this tutorial.
For that reason I wrote bufferedSend function, receiving WWW server object, pointer to data buffer and size of the buffer as it’s parameters. Why don’t use functions returning the size of a string, like strlen? Because it will work only with text data. When the data is binary (like images), the a character denoting end of the text string could appear in legal data stream.
In C and C++ the end of a text string is 0 (not the digit 0, but a byte with value of 0). If in our data stream zeros could appear, all the functions provided by the standard library would be useless.
For that reason we need to define the amount of the data sent to the buffer.
Basically, that’s all. We already have WWW server sending data from SD card.
Does it have any sense?
After a couple of tests with more complex websites (not only one HTML file, but some CSSes and images) you will realize that this solution has certain limits. Arduino is single-threaded, so every element from our site is downloaded separately – we need to finish sending first file before sending another. This means, from the user’s point of view, the site loads slowly if we need to fetch HTML, some CSS, images.
So, how can this be useful? Arduino can present data collected with sensors in more friendly form if the limit of RAM memory could be bypassed. Keeping HTML code on SD card we are bypassing it. But how to put data collected by Arduino sensors to HTML page on SD?
We need something that will allow us to inject data to HTML between ‘reading’ and sending’. Something like:
PHP for Arduino
OK, it’s a bit exaggerated :) We need something more like templates not full PHP, but at it’s beginning PHP also wasn’t a miracle :)
How to make such a parser (and full sketch code) – in the next part. Stay tuned.
One thought on “P4A – PHP for Arduino part 1”