Wireless temperature sensor programmed with Arduino IDE
tinyBrd is small development board, with ATtiny84 and NRF24L01+ connector. With software provided by us, You get easy to use board which can send data by radio to Raspberry Pi or Arduino UNO and run many days (our most recent tests show it will run at least 2-3 weeks in this scenario) on single CR2032 battery.
When in sleep mode whole board with NRF24L01 and DS18B20 takes as low as 5 µA!
Tools and materials
To build this example You will need:
Of course You will need tools like solder iron, wire cutter, etc.
To receive data we suggest use Raspberry Pi and our NRF-Hat – simple board to connect NRF24L01+ directly to RPi, without mess (no cables required).
First install Nettigo tinyBrd Core to get support for Arduino IDE, instructions are here: https://starter-kit.nettigo.eu/2015/tinybrd-getting-stuff-installed/ With working Nettigo tinyBrd Core we can start with building our sensor.
Connect DS18B20 to tinyBrd
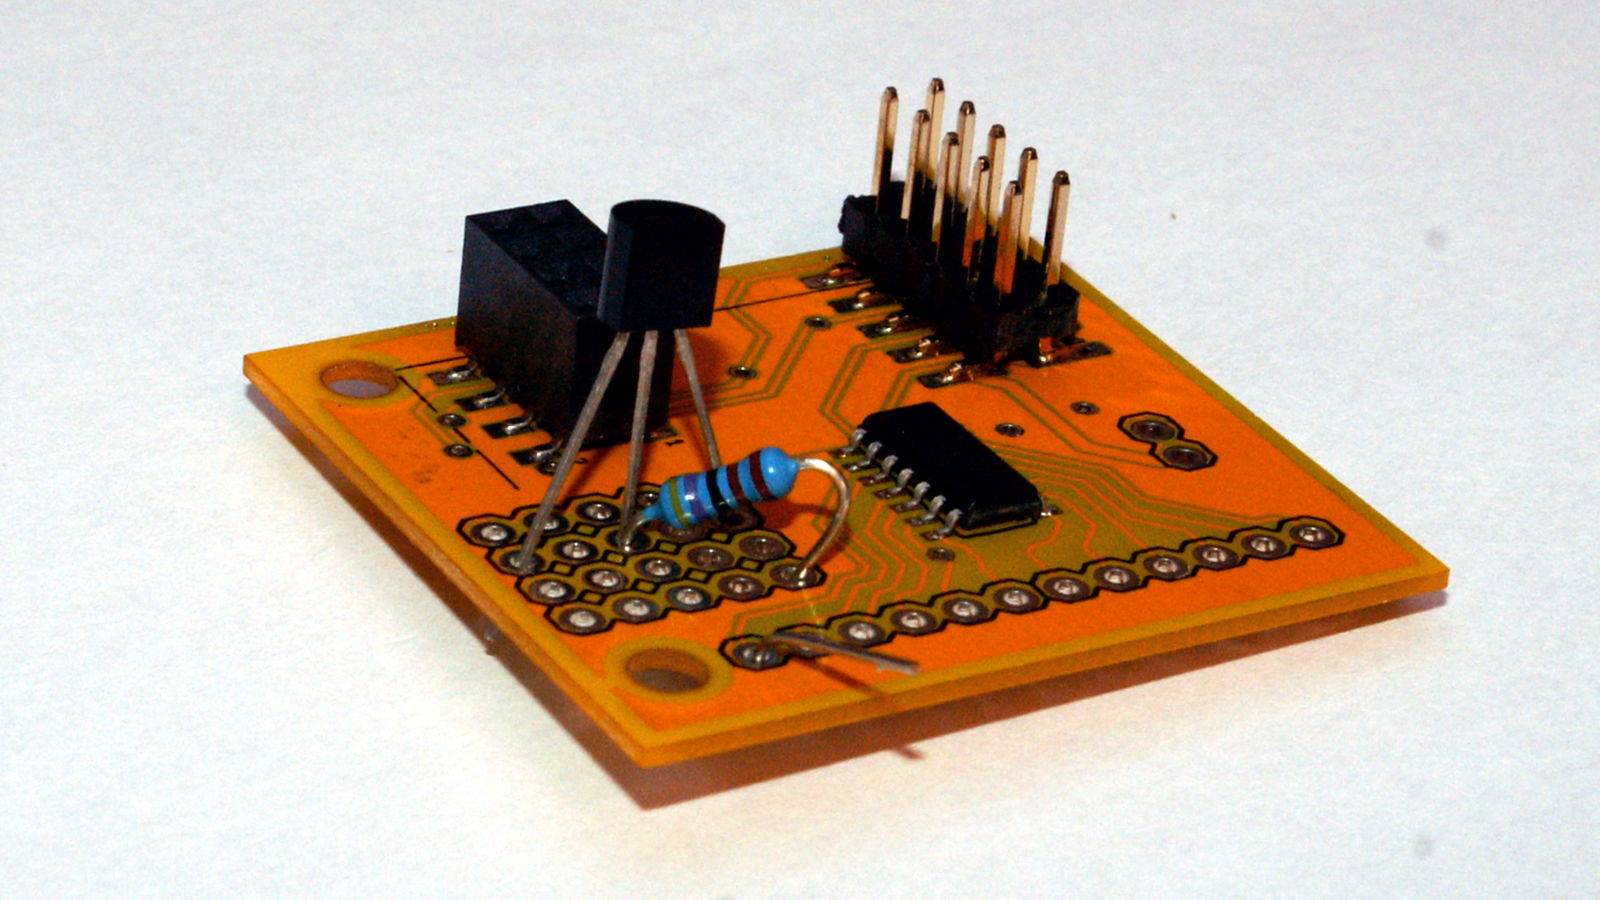
Picture above is done with some early version of tinyBrd, but essentials are now the same. Seeing on picture there is small prototype area, we can use it to solder some components. On the left edge of this area GND is provided to each pad, on right Vcc. So connecting DS that way provides Vcc and GND to temperature sensor. Use resistor to provide pull-up. Notice, that resistor leg connected to signal pin is bend and goes to D0 input (under the board). You can do that way or use just hookup-wire to connect middle leg of DS18B20 do D0.
DS18B20 polarization – notice how case of DS18B20 is oriented – the round side is facing NRF24L01+ connector.
Sending data to Raspberry Pi using tinyBrd and NRF24L01+
tinyBrd
First You will need two libraries for tinyBrd to get DS18B20 working:
Unpack them into libraries folder and restart Arduino IDE. Now I assume, You have installed tinyBrd Examples as is described in Nettigo tinyBrd Core installation instructions. So, You have example tinyBrdExamples/tinyBrdTemp and You can upload it to tinyBrd. This sketch will get ask DS18B20 sensor connected do D0 to report temperature, so there is no need get sensor address.
If You want to use more than one tinyBrd to send data to Raspberry, remember to change line data.id = 6; in setup for each sensor using different id.
Raspberry Pi
Connect NRF24L01+ – using NRF-Hat is simplest method – no cables, no mess, just plug hat and NRF24L01 on it.
Now download zip from https://github.com/nettigo/tinyBrdScripts and unpack it. Inside You will find folder tinyBrdRecv which is basic example of receiving data from tinyBrd. Then start receive.py. All can be done on Raspberry using comands
$ wget https://github.com/nettigo/tinyBrdScripts/archive/master.zip
$ unzip master.zip
$ cd tinyBrdScripts-master/tinyBrdRecv/
$ sudo python3 ./receive.py
Output should be similar to:
05 Mar 2016 09:51:51: ID:1: Msg 194#0 from node: 1 => (1, 3805, 0, 23.154300689697266, 194, 0)
05 Mar 2016 09:51:52: ID:2: Msg 250#0 from node: 2 => (2, 2788, 0, 21.6875, 250, 0)
05 Mar 2016 09:51:55: ID:6: Msg 15#0 from node: 6 => (6, 2675, 0, 20.625, 15, 0
As You can see in our example are 3 sensors, with IDs 1,2 and 6. In parenthesis are decoded all fields from DataSensor structure used in tinyBrd sketch: ID, battery, status, payload, seq and retry. In following example sensor with ID:1 is sending temperature from analog sensor, so it has a bit different format.
One thought on “Wireless temperature sensor programmed with Arduino IDE”