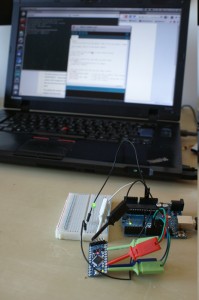
Arduino as ISP or how to burn bootloader
Often You need burn bootloader onto ATmega chip. You can always buy chip with preloaded bootloader or ISP programmer like USBASP, however any working Arduino can be used as one.

You can do as follows:
- download ArduinoISP sketch in working Arduino (menu File/Examples/ArduinoISP) as any other sketch
- connect chip in following way (on right are labels from Arduino UNO)
- power – 5V (unless chip is low voltage, than only 3.3V)
- ground – GND
- MOSI – D11
- MISO – D12
- SCK – D13
- reset – D10
- if You use some Mega as ISP then
- MOSI – D51
- MISO – D50
- SCK – D52
- reset – D53
- You can always burn bootloader in chip in other Arduino board so You can go with SMD chips (on picture: burning bootloader in Arduino Pro Mini)
- In menu choose programmer: Tools/Programmer/Arduino as ISP
- In menu Tools/Board choose board for which You plan to burn bootloader, not host board (on picture we are burning Pro Mini btl on UNO, so in Boards menu Arduino Pro or Pro Mini (5V, 16 Mhz) w/ATmega328 was selected)
- The last step is menu Tools/Burn Bootloader and wait for ‘Done burning bootloader’
To see what is going on You can connect few LEDs to host board: D9 – heartbeat (sign ISP sketch is running), D8 – errror in programming, D7 – work in progress.

Hi
Great guide, however you forgot to add one important thing:
To actually burn, the user need not use the “Upload” menu item(Ctrl-U), but the “Upload Using Programmer” menu item(Ctrl-Shift-U).
I would put that with Bold even, since people who always pressed Ctrl-U, will not be aware that now when using a Burner, it has a different menu item(or keyboard shortcut)
Thank you or the guide
thanks man, and the ctrl + shift + u really helps me too! i was scratching my head the whole day and u just solved my problems!
hi. thanks. this really helped me.